Meta Simplifies Pixel Setup with Official Google Tag Manager Template
Meta’s long-awaited official Google Tag Manager Template is here — eliminating third-party workarounds, reusing your existing GA4 dataLayer, and auto-mapping ecommerce events for cross-platform advertisers.
What Just Happened: Meta's Official GTM Template
In a significant move for digital advertisers worldwide, Meta Platforms has released an official Meta Pixel template directly inside Google Tag Manager, replacing the need for third-party or community-built workarounds that teams have relied on for years.

What’s Happening: Meta released an official Pixel template inside Google Tag Manager’s template gallery, replacing the need for third-party or community-built workarounds. The update was first spotted by Paid Media expert Thomas Eccel, who shared it on LinkedIn on April 8, 2026.
This is not a minor quality-of-life update. For any team running paid social alongside Google campaigns, this development fundamentally changes how cross-platform tracking is set up and maintained — and for the better.
“Meta is removing one of the biggest headaches in ad tracking — making it faster and easier to get reliable data across platforms.”
What Is Meta Pixel and Why Does It Matter?
The Meta Pixel (still widely known as the Facebook Pixel) is a piece of JavaScript code that you place on your website. It allows Meta’s advertising platform to measure user behaviour, track conversions, optimise campaigns, and build powerful retargeting audiences.
Key Limitation of Community Templates
While community templates are reviewed by Google before publication and are safe to use, they operate outside of Meta’s official product development lifecycle, meaning updates could lag, and enterprise teams were sometimes cautious about depending on them.
Technical Note
The community template was found under Tags → New → Search Gallery → “Facebook Pixel” in GTM, and required manual addition to the workspace before first use.
How the Pixel Powers Ad Campaigns
Once placed on a site, the Meta Pixel enables three critical advertising functions:
How the New Official Template Works
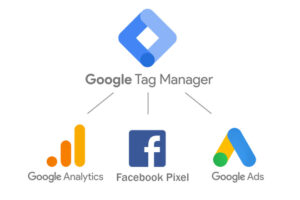
The key innovation of Meta’s official GTM template lies in its integration with Google’s own data layer — a feature that makes cross-platform tracking dramatically simpler for any team already running GA4.
GA4 dataLayer Reuse
The new template allows advertisers to reuse their existing GA4 dataLayer. This means events already configured for Google Analytics 4 can be leveraged for Meta tracking without rebuilding the implementation from scratch.

The dataLayer as a Single Source of Truth
Using Google Tag Manager with a structured dataLayer solves the core problem of fragile, design-coupled tracking. The dataLayer decouples tracking logic from the visual presentation layer, meaning your analytics setup survives site redesigns, A/B tests, and CMS migrations without breaking.
Auto-Mapped Ecommerce Events
The template also automatically maps enhanced ecommerce events, eliminating the need for duplicate tagging of the following key interactions:
| GA4 Event | Meta Standard Event | Business Value |
|---|---|---|
| purchase | Purchase | Revenue attribution, ROAS measurement |
| add_to_cart | AddToCart | Cart abandonment retargeting |
| view_item | ViewContent | Product interest audiences |
| begin_checkout | InitiateCheckout | Checkout funnel optimisation |
| generate_lead | Lead | Lead gen campaign measurement |
| sign_up | CompleteRegistration | Subscriber / account creation tracking |
Step-by-Step Setup Guide
Setting up the Meta Pixel via the new official GTM template is straightforward. Here is the complete implementation process:
Prerequisites

Step-by-Step Instructions
Step 1: Get your Pixel ID. Log in to Meta Events Manager, navigate to your Pixel, and copy the Pixel ID. If you haven’t created one yet, click “Connect Data Sources” → “Web” → name your Pixel.
Step 2: Create a Constant Variable for your Pixel ID. In GTM, go to Variables → New → Constant variable type. Paste your Pixel ID as the value. This allows you to reuse the ID across multiple tags without re-entering it manually each time.
Step 3: Find the official Meta Pixel template. In GTM, navigate to Templates → Tag Templates → Search Gallery—type “Meta Pixel” or “Facebook” in the search field. Select the template labelled Meta Pixel with “facebook” or “facebookarchive” as the publisher.
Step 4: Add the template to your workspace. Click “Add to Workspace” and confirm any permission prompts. The template will appear in your Tags section under Custom templates.
Step 5: Create the PageView tag. Go to Tags → New. Select the Meta Pixel template. Enter your Pixel ID (or reference the Constant variable). Set the trigger to “All Pages — Page View” to fire the base Pixel code on every page.
Step 6: Configure event mapping (for e-commerce). If your site uses GA4 ecommerce dataLayer, enable the GA4 dataLayer compatibility option in the tag to auto-map events like purchase, add_to_cart, and view_item.
Step 7: Test in Preview mode. Use GTM’s built-in Preview mode to verify tags fire correctly. Install the Meta Pixel Helper Chrome extension to confirm the Pixel ID matches, events are firing, and data is being sent to Meta Events Manager.
Step 8: Publish your container. Once testing confirms everything works, submit and publish your GTM container changes. Check the Meta Events Manager for incoming events within a few minutes.
Setting up the Meta Pixel via the new official GTM template is straightforward. Here is the complete implementation process:
Prerequisites
Step-by-Step Instructions
Step 1: Get your Pixel ID. Log in to Meta Events Manager, navigate to your Pixel, and copy the Pixel ID. If you haven’t created one yet, click “Connect Data Sources” → “Web” → name your Pixel.
Step 2: Create a Constant Variable for your Pixel ID. In GTM, go to Variables → New → Constant variable type. Paste your Pixel ID as the value. This allows you to reuse the ID across multiple tags without re-entering it manually each time.
Step 3: Find the official Meta Pixel template. In GTM, navigate to Templates → Tag Templates → Search Gallery. Type “Meta Pixel” or “Facebook” in the search field. Select the template labelled Meta Pixel with “facebook” or “facebookarchive” as the publisher.
Step 4: Add the template to your workspace. Click “Add to Workspace” and confirm any permission prompts. The template will appear in your Tags section under Custom templates.
Step 5: Create the PageView tag. Go to Tags → New. Select the Meta Pixel template. Enter your Pixel ID (or reference the Constant variable). Set the trigger to “All Pages — Page View” to fire the base Pixel code on every page.
Step 6: Configure event mapping (for ecommerce). If your site uses GA4 ecommerce dataLayer, enable the GA4 dataLayer compatibility option in the tag to auto-map events like purchase, add_to_cart, and view_item.
Step 7: Test in Preview mode. Use GTM’s built-in Preview mode to verify tags fire correctly. Install the Meta Pixel Helper Chrome extension to confirm the Pixel ID matches, events are firing, and data is being sent to Meta Events Manager.
Step 8: Publish your container. Once testing confirms everything works, submit and publish your GTM container changes. Check the Meta Events Manager for incoming events within a few minutes.
Sample Tag Configuration Reference GTM Tag Setup — Conceptual Overview
Tag Name: Meta Pixel — All Pages (Base Code)
Tag Type: Meta Pixel [Official Template]
Pixel ID: {{Constant - Meta Pixel ID}}
Event Type: PageView
Trigger: All Pages — Page View
---
Tag Name: Meta Pixel — Purchase Event
Tag Type: Meta Pixel [Official Template]
Pixel ID: {{Constant - Meta Pixel ID}}
Event Type: Purchase (auto-mapped from GA4 dataLayer)
Parameters: value, currency, content_ids (from dataLayer variables)
Trigger: GA4 — purchase eventConsent Note
Always configure a consent trigger to ensure the Pixel only fires after users have granted appropriate consent — especially in jurisdictions covered by GDPR, CCPA, or similar privacy regulations. GTM’s built-in Consent Mode is the recommended approach.
Old Method vs. New Method
| Criterion | Manual Custom HTML | Community Template (facebookarchive) | Official Meta Template (New ✨) |
|---|---|---|---|
| Source | Meta Events Manager | GTM Community Gallery (third-party) | Official Meta / GTM Gallery |
| Coding Required? | ✗ Yes — JS knowledge needed | ✓ No | ✓ No |
| GA4 dataLayer Reuse | ✗ Manual mapping | ✗ Manual mapping | ✓ Automatic |
| Auto Ecommerce Events | ✗ Manual | ✗ Manual | ✓ Auto-mapped |
| Error Risk | ✗ High (copy-paste errors) | ⚠️ Medium | ✓ Low |
| Official Support | ✗ No | ✗ No | ✓ Yes |
| Update Cycle | Ad hoc | Community-maintained | Meta product roadmap |
| Consent Mode Compatible | ⚠️ Manual setup | ⚠️ Manual setup | ✓ Built-in |
Why Every Advertiser Should Care
This update carries substantial implications for agencies, in-house teams, and freelance media buyers alike.
Reduced Implementation Time
For teams already tracking ecommerce events in GA4, the official template can significantly reduce the time needed to launch Meta tracking. Events that previously required building separate triggers, dataLayer readers, and custom parameters can now be mapped automatically.
Lower Risk of Tracking Errors
Using the official Meta Pixel template reduces the risk of typos or implementation errors that easily occur when copying and pasting JavaScript code manually. Error-free tracking means more reliable attribution data — and better-optimized campaigns.
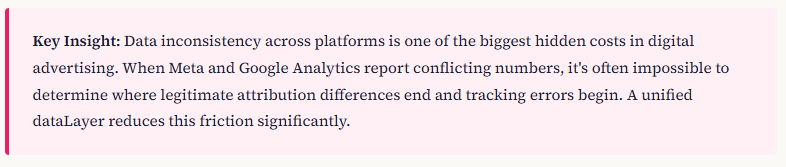
Cross-Platform Consistency

Broader Adoption of Meta Pixel
There is a cohort of technically cautious advertisers who previously avoided implementing the Meta Pixel due to the complexity of manual setups. An official, low-code template from Meta itself removes the primary barrier — making Pixel adoption more accessible across business sizes.
Signal for Broader Platform Integrations
This move raises an important question for the industry: could similar cross-platform integrations follow? The precedent of Meta publishing an official GTM template opens a door for TikTok, LinkedIn, Pinterest, and other ad platforms to pursue comparable native integrations with Google Tag Manager.
Expert Best Practices for Meta Pixel in GTM
Always Use a Constant Variable for Your Pixel ID
Store your Meta Pixel ID in a GTM Constant Variable rather than hardcoding it into each tag. This means if your Pixel ID ever changes, you update it in one place instead of hunting through multiple tags.
Implement Event Deduplication
If you are running both browser-side Pixel tracking and server-side Conversions API (CAPI), always implement an event_id parameter on both sides. This allows Meta to deduplicate events and prevent double-counting conversions. Purpose-built GTM templates from the community (such as the Unique Event ID variable by stape.io) can handle this automatically.
Why Deduplication Matters
Without proper deduplication, a single purchase can be reported as two conversions — inflating your ROAS numbers and causing the algorithm to optimise against misleading signal data.
Use Advanced Matching for Better Audience Quality
The Meta Pixel supports Advanced Matching — the ability to pass hashed user data (email addresses, phone numbers) alongside events to improve match rates. Configure GTM dataLayer variables to capture this data from your CRM or login systems, and reference them in the Pixel tag configuration.
Privacy Reminder
All personally identifiable information (PII) must be hashed before it is sent to Meta. The official GTM template handles SHA-256 hashing automatically for standard Advanced Matching fields — never send raw PII.
Use GTM Preview Mode Before Every Publish
GTM’s Preview mode is one of its most valuable features. It shows exactly which tags fired on each page, which triggers activated them, and any configuration errors — all before a single live user is affected. Never publish a new Pixel configuration without running a full Preview test first.
Archive, Don’t Delete Old Tags
When replacing community Pixel templates with the new official version, archive old tags rather than deleting them. This preserves a history of what was previously configured and provides an audit trail.
GTM Governance Note
Name every tag, trigger, and variable clearly and consistently — for example, “Meta Pixel — Purchase — eCommerce” is far more maintainable than “Tag 14.” Use GTM folders to organise tags by platform or campaign.
About the Author
This article was written by Sandeep Kumar Rajput, Digital Marketing Manager with expertise in SEO and performance marketing. Insights are based on Google Search Central guidelines and industry research.
Last updated: April 09, 2026.
Sources & References
- Adegbola, A. (April 8, 2026). Meta simplifies Pixel setup with official Google Tag Manager template. Search Engine Land.
https://searchengineland.com/meta-simplifies-pixel-setup-with-official-google-tag-manager-template-473882 - Analytics Mania. (Updated January 4, 2026). How to Install Meta Pixel with Google Tag Manager (Facebook Pixel) (2026).
https://www.analyticsmania.com/post/facebook-pixel-with-google-tag-manager/ - Meta Business Help Center. Add the Meta Pixel in Google Tag Manager.
https://www.facebook.com/business/help/1021909254506499